
Disc and Cover Artwork Guidelines
Now that your artwork is complete, you need to get it ready to go to print. Follow the instructions below to prepare your disc and cover artwork. With your help, we can finish your order much faster and you won't incur additional charges. This guide is for use with Adobe Photoshop, we are using version CS5, previous or newer versions should be similar.
Step 1: Rasterize Text Layers:
If you haven't already, save a copy of your file, as you will not be able to edit text layers after rasterization.
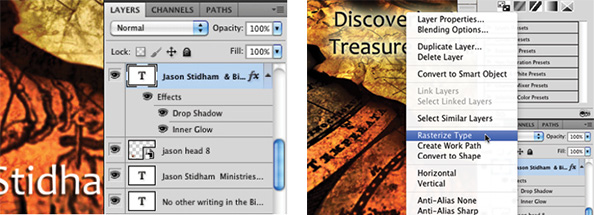
In many cases, we won't have the same fonts installed on our systems that you do. To keep the same font style, you will need to rasterize your text layers so that we can view and print them correctly. This step is easy, but can be tedious if you have a lot of text layers and a lot of files. Right click on your type layer, and select "Rasterize Type". This will change your text into a raster image which we will be able to view on our computers.
You can easily tell which layers have unrasterized text by the white box and "T".
Step 2: Proper Use of Guides:
Guides are very important in insuring your artwork is printed correctly, with no white borders or artwork getting cut off. If your artwork is not already in a template with guides, you will need to download the template and copy over your artwork.
Below is a template with content in the right position. The red line is where the printer will cut the paper, but you need to have your background stretch all the way up to the blue line, or "bleed" line. The dotted red lines are where the cover will be folded, and the green lines are where your content should be within.

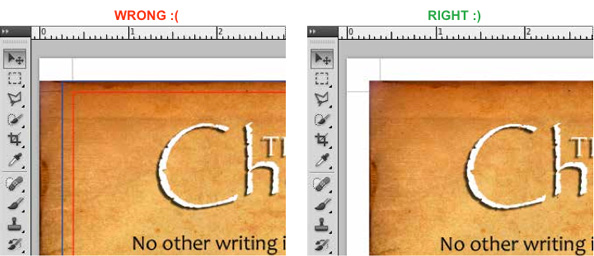
The small black lines on the edges are for trimming the paper to fit in cases, this layer should be behind all of the artwork.
Step 3: Save Final Artwork File (Not Disc):
At this point, your artwork is almost ready. Make sure you hide the colored guide layers (red, green and blue) but keep the black guide layer visible.
For the case wrap, you will need to save the file as a Photoshop PDF.
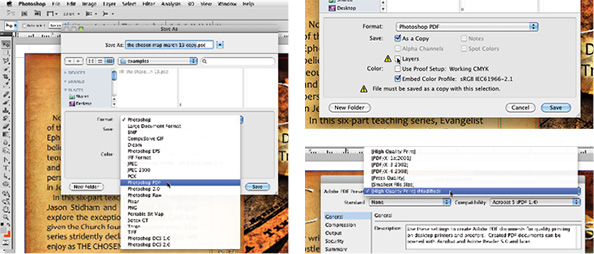
Go to "File > Save As" and select "Photoshop PDF" from the drop down. Make sure you uncheck the "Layers" box, which will save the file as a copy. Hit "Save" then "Ok" in the next popup window.
The Adobe PDF settings box will appear, "High Quality Print (Modified)" should be selected in the drop down. If so, click "Save PDF" in the bottom right, and you're done!
Step 4: Save Final Disc Artwork File:
For disc artwork, turn off guide layer, save the file as a TIFF. Go to "File > Save As" and select "TIFF" near the bottom. Make sure you uncheck the "Layers" box, which will save the file as a copy, then click "Save". Click "Ok" in the next popup window, and your file will be saved. Make sure your disc follows the guides like below, and turn off the guides before saving.


